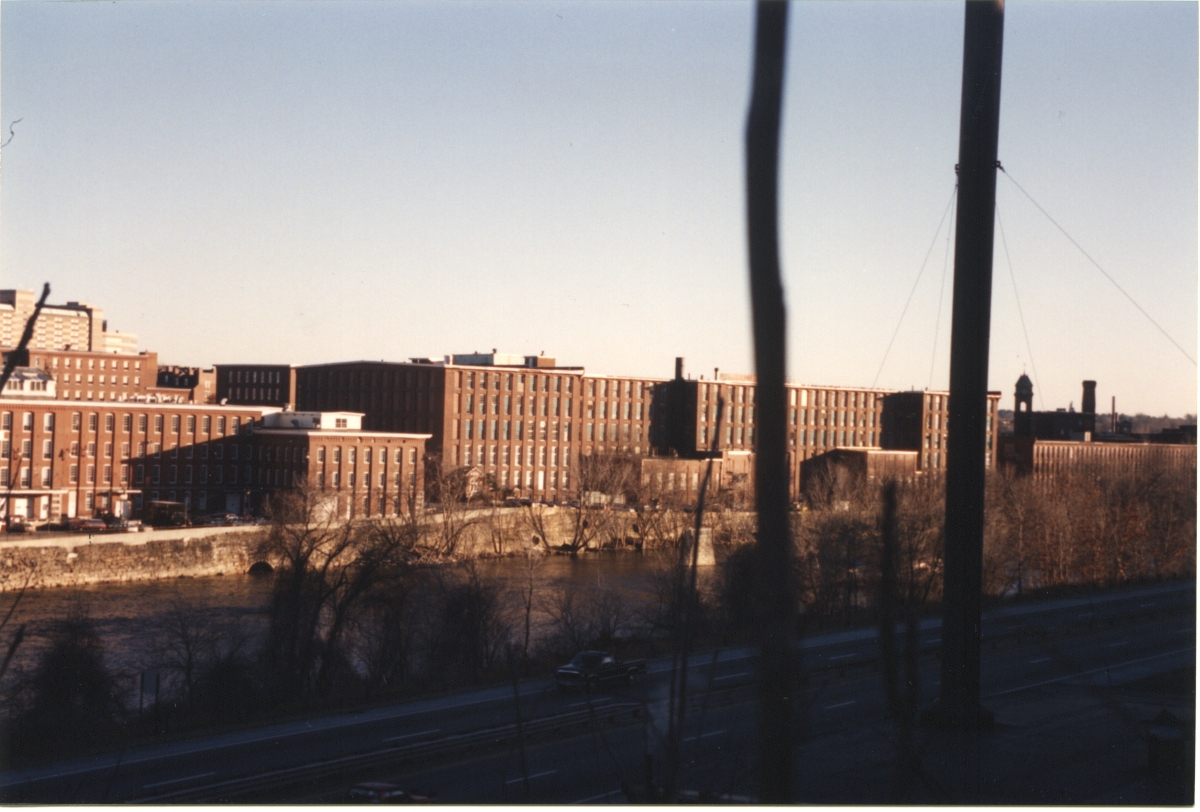
 Manchester, NH: Amoskeag Mill complex
The Sandy Lake and Northern connects Pennsylvania and New England (bypassing New York altogether :-) and is set in the 1890s. One thing I wanted to capture is a typical New England mill scene.
Manchester, NH: Amoskeag Mill complex
Here's a shot of the model mill area, showing the mill canal:
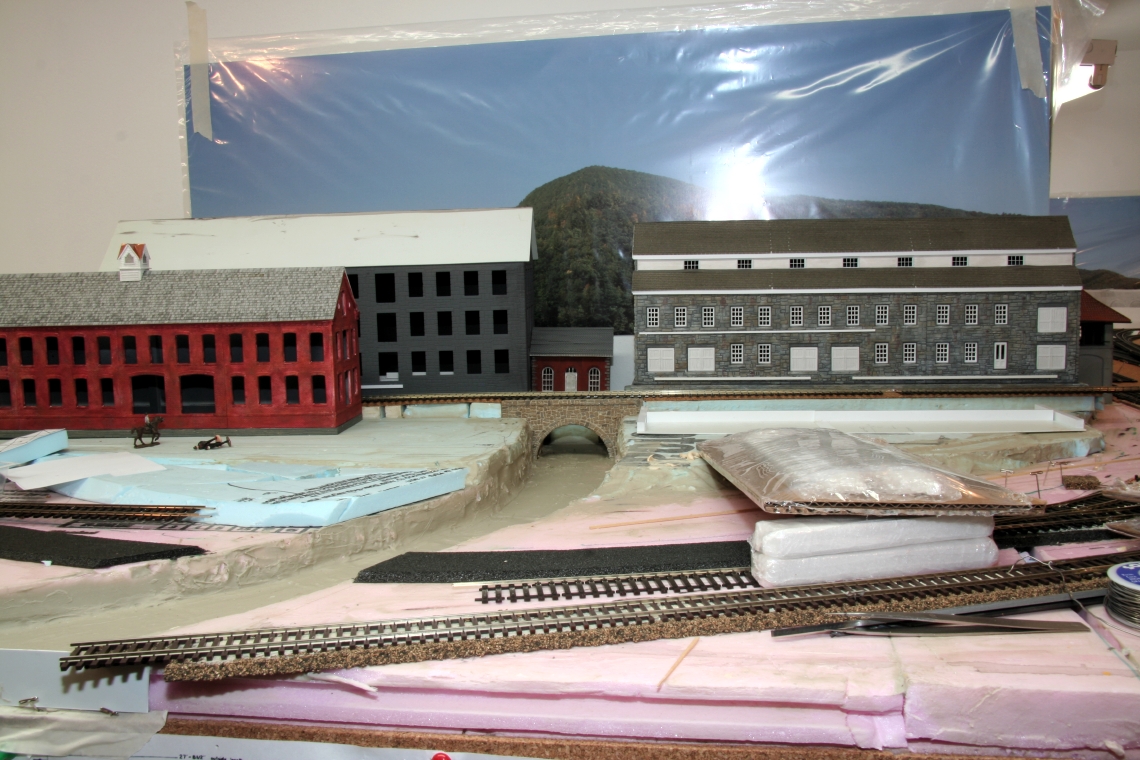 The mill canal
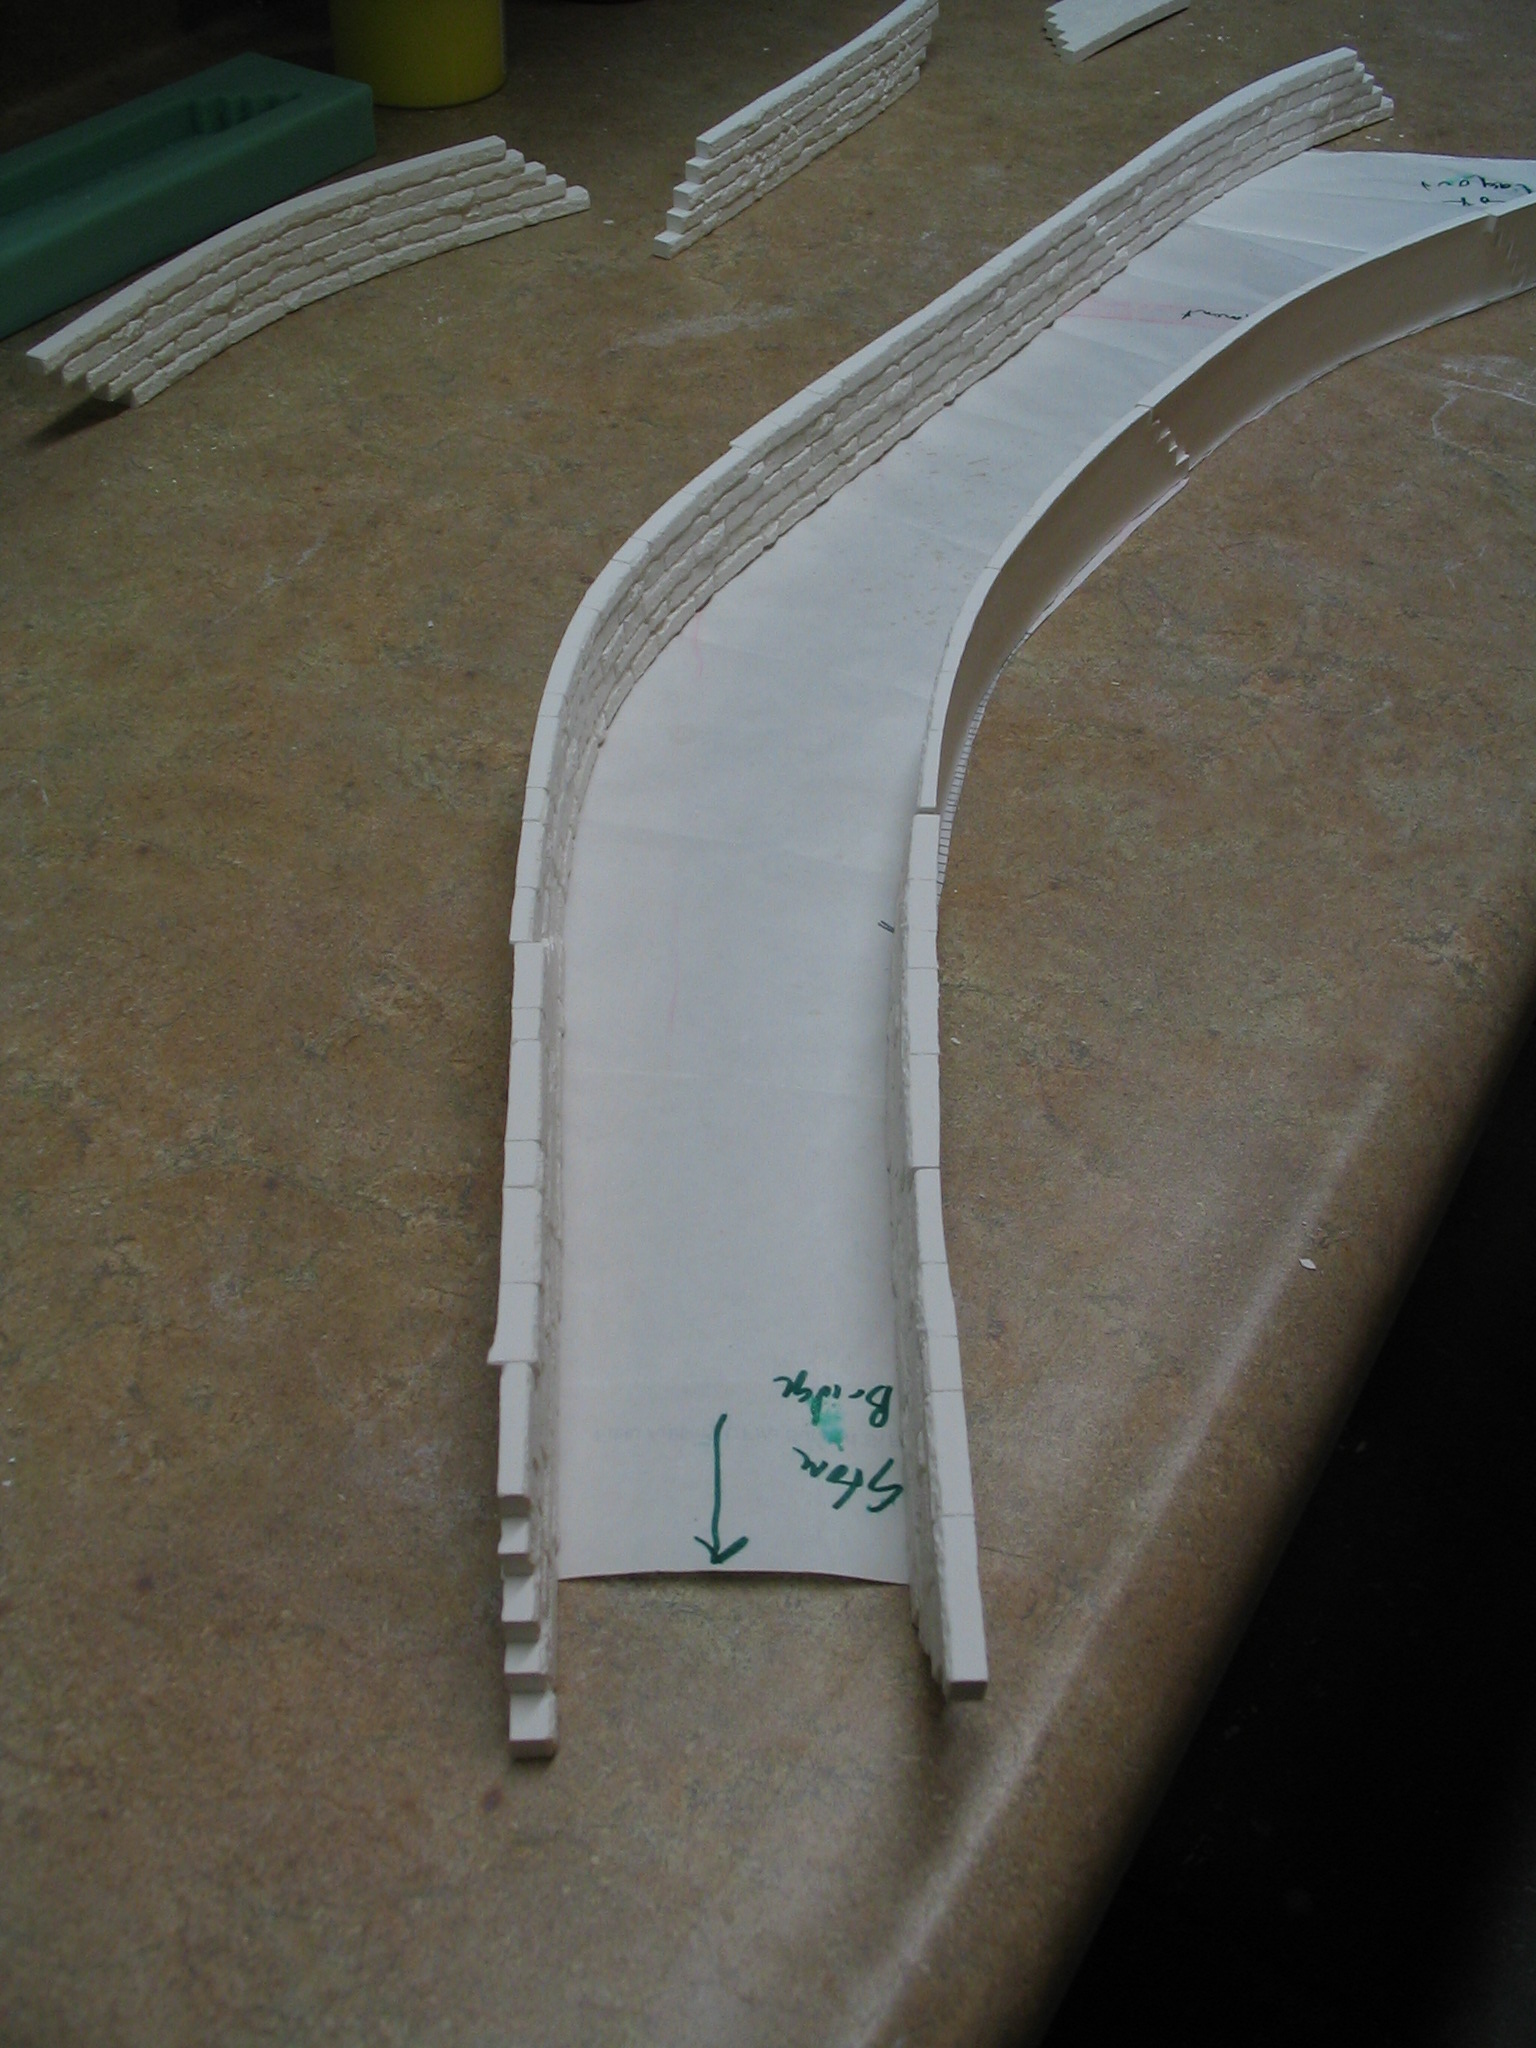
My original idea for the mill canal was to use O scale styrene brick sheeting from The N Scale Architect's Model Builder's Supply Line. You can see an example of this on pictures with the stone arch bridge removed. The brick canal gatehouse (kitbashed from an RDA/Ertl Vermont station) sits on top of stonework done with this O scale brick. Since I've not painted the stonework, it's hard to see the texture.
But then I discovered New England Brownstone. Some email exchanges with Russ Greene indicated that he would be interested in doing some custom molding. I traced the canal bed and sent it to him, along with a down payment. A couple weeks later (This was right about the time of the Amherst Model Railroad Show, so Russ had other commitments to work through.), Russ sent me back the following picture (along with a bill for the balance due):
 Castings fitted to my canal bed trace, Russ Greene photo
The rest of this page is a blog on how I installed these castings.
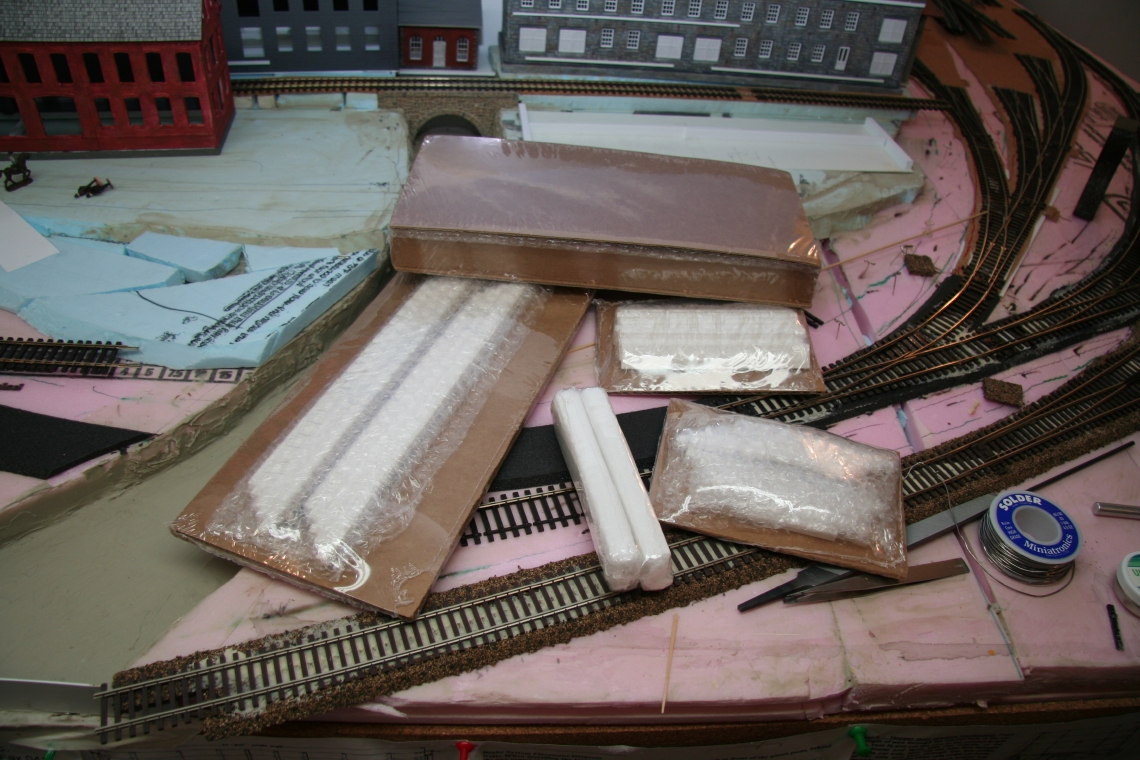 Castings ready to be unpacked
The next step was to lay out the goodies to see how they fit.
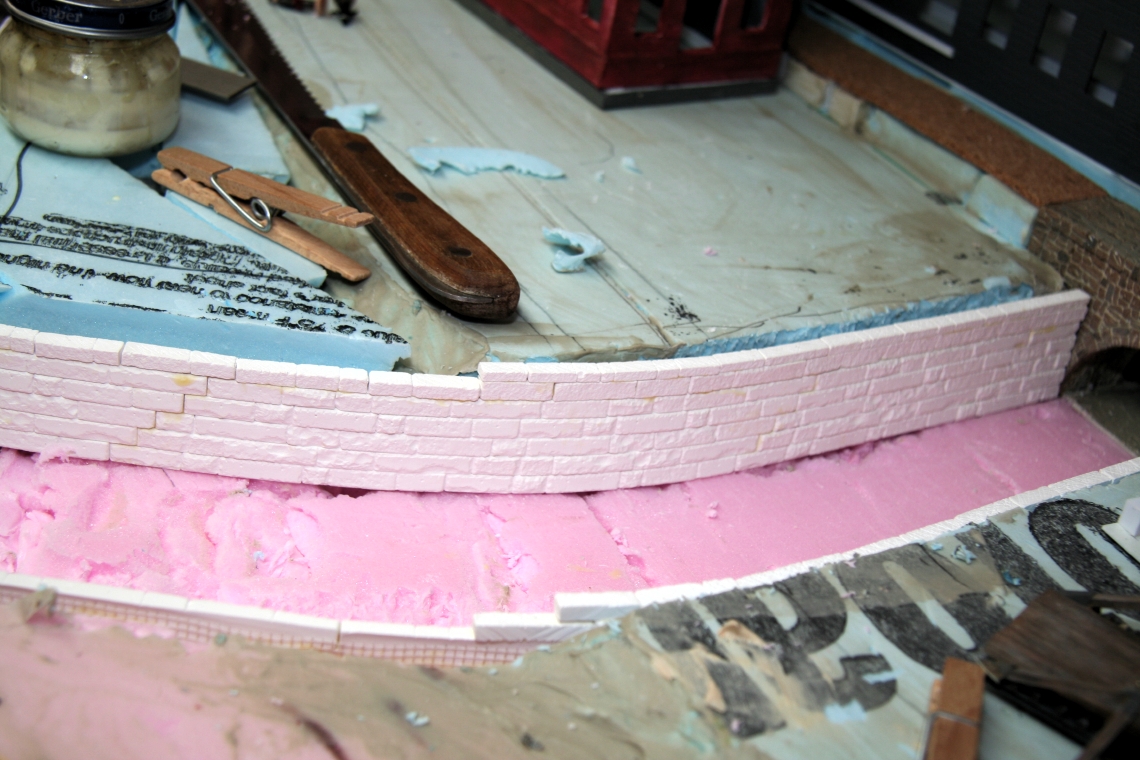
 First fitting for the walls
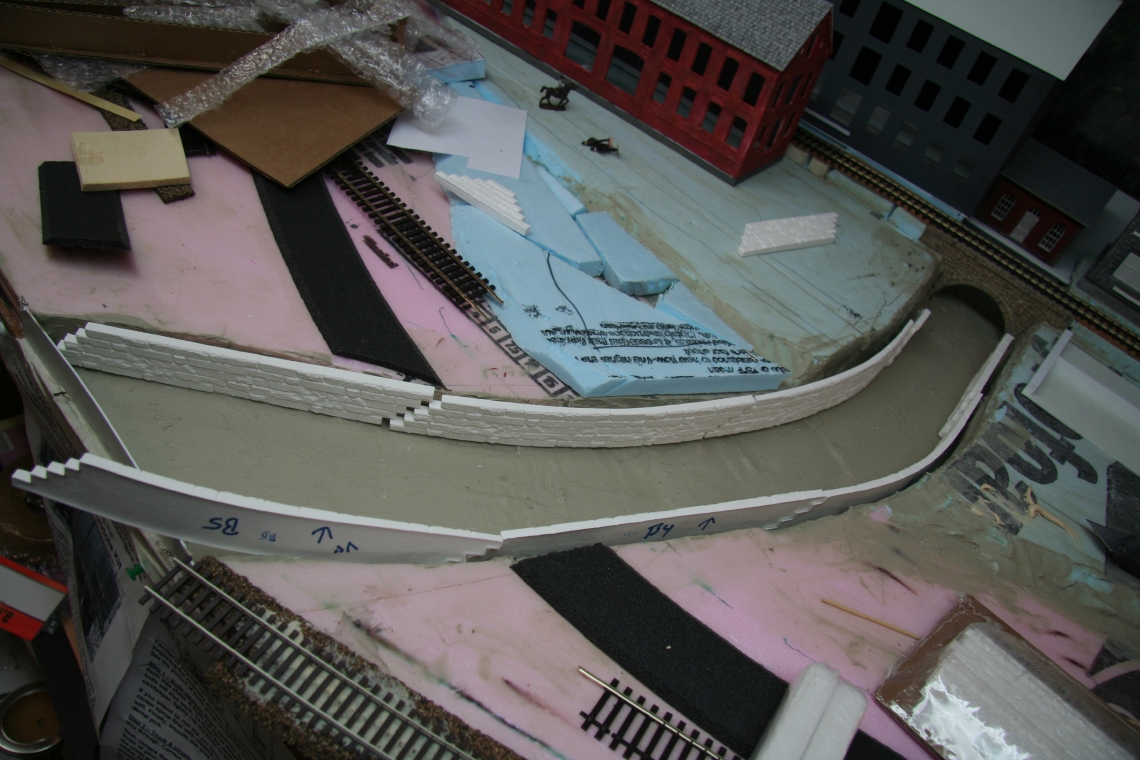
Notice the brown colored material in the canal bed. This is exterior spackle. (A suggestion from Dave Frary's 3rd edition scenery book.) The good things about this stuff are that (a) it sticks to styrofoam and (b) it's very tough once dry. However, (b) is also a liability when it comes to reshaping things. What was clear was that I needed to do some cutting of the styrofoam to better accomodate the new walls.
After a lot of work, and the liberal application of inappropriate language, I removed all of the exterior spackle and reshaped the styrofoam. The wicked-looking knife in the right hand side is a linoleum knife, which is very good for this kind of work. Not shown here, but also very useful, is a curved Surform plane. I undercut the styrofoam walls, as I wanted the stonework to sit vertically. (I suspect the prototype actually slopes towards the canal bed at the bottom, but that would have required a lot more support from the castings and is not worth the hassle.)
 The reshaped canal bed
Time for the second fitting. You can see the Surform curved plane (yellow handle). Note how well the castings line up.
 Second fitting, things are looking good...
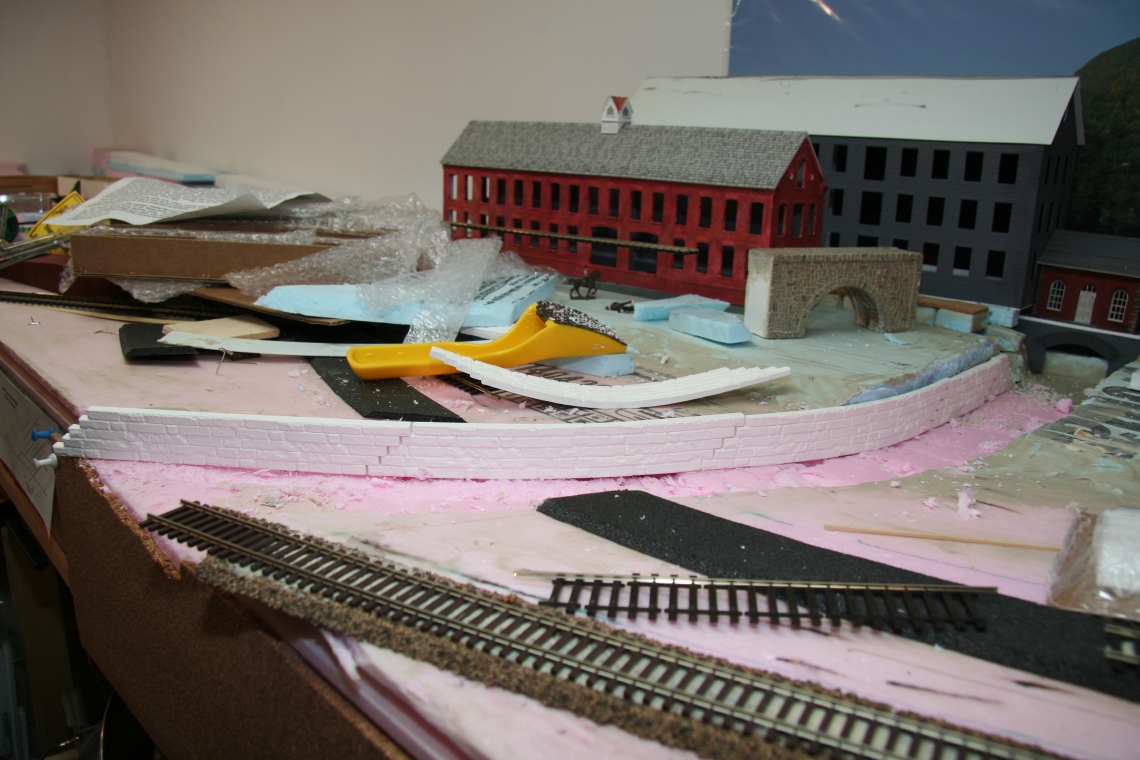
Once I was happy with the fit of the castings against the styrofoam, I covered the front with masking tape, to hold the castings to the curved shape. Then I went to the garage to get "fiberglass drywall crack tape" that I had leftover from some 1-1 scale work (available at your local building store). I globbed yellow glue on the middle of the back of each casting. At the casting junctions, I did not apply glue (you can see this on the right of the photo.) This gave me some more wiggle room to position things before gluing the castings to each other, but held the set of castings together.
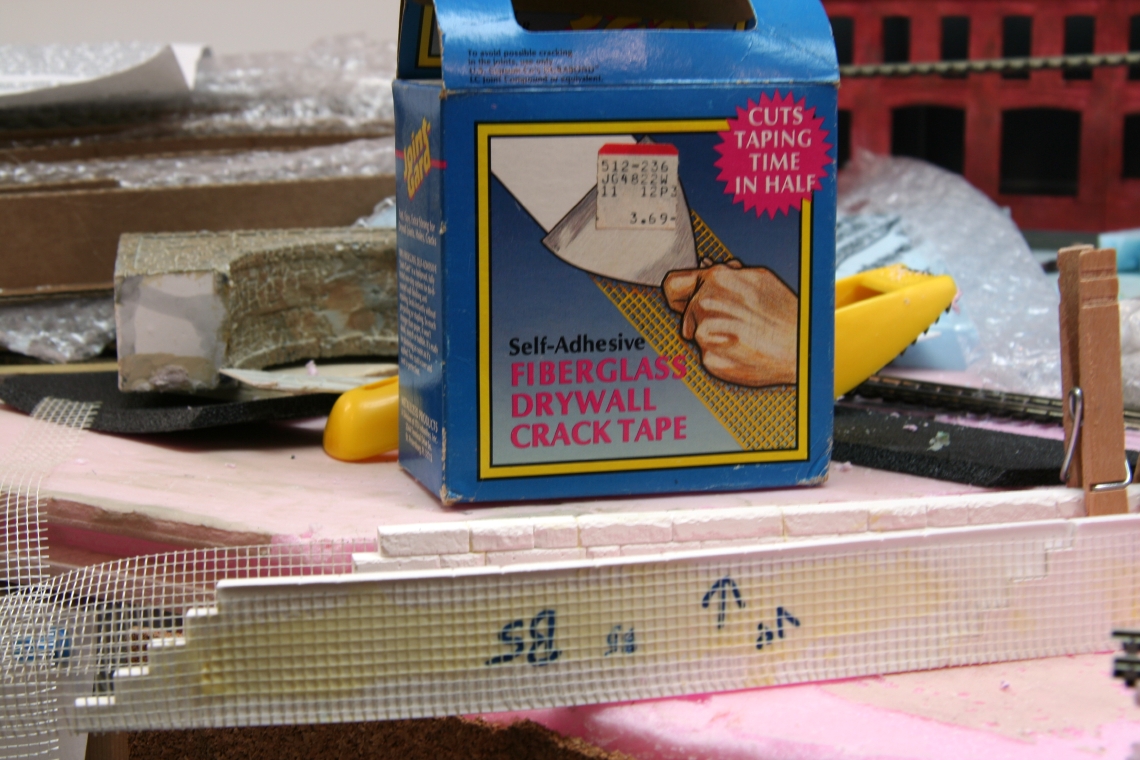 Reinforced backing to hold the castings together
The next step is to glue the castings to each other. This is the final fitting, and I can wiggle the castings apart to apply the glue. Then I used clothespins to hold the castings together while the glue dries.
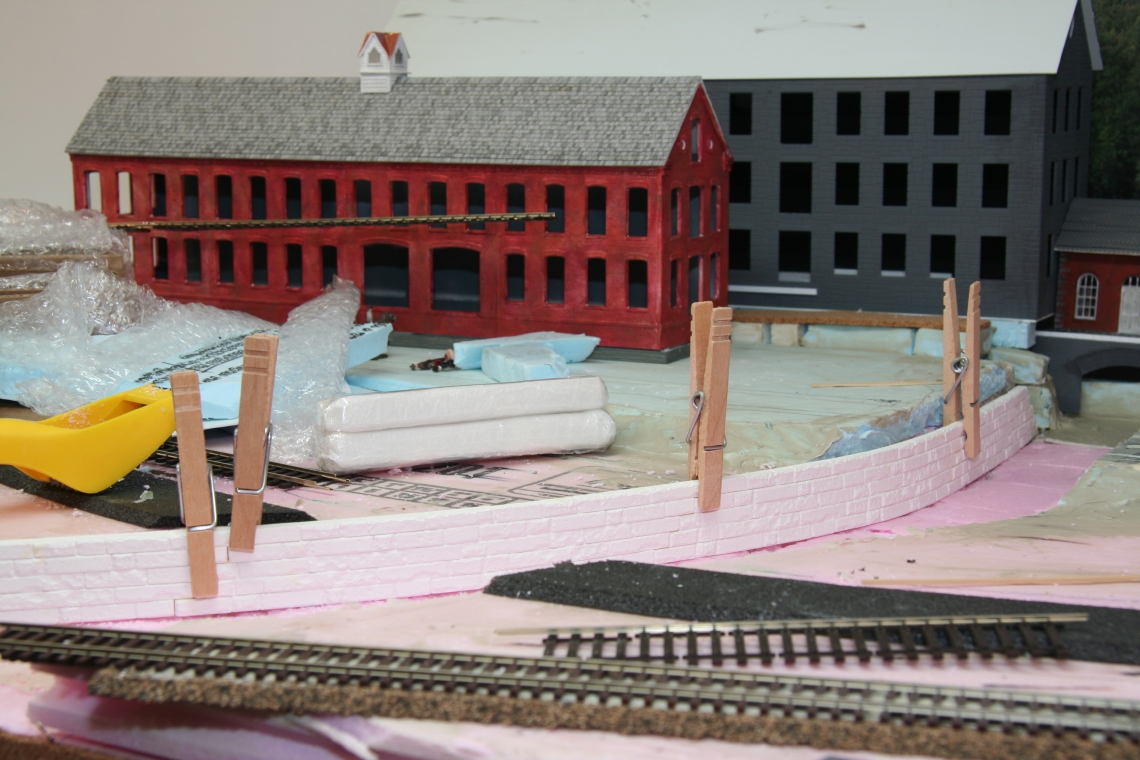 Clothespins make nice gentle clamps
I think what I should have done was assemble the casting sequence on a flat surface/worktable, rather than on the layout. By trying to do this on the layout, it got harder to keep everything tight and in alignment, and well glued. In the end it'll come out OK.
Russ included some extra stone courses to add where the walls don't come up to the full height towards the back of the canal (by the mill buildings themselves.) These pieces are 1/2" wide, though, and my walls are only 1/4". My plan is to see if I can rip-cut them on my modeler's table saw (with the vacuum running full blast to suck up the dust this will create.)
Cutting the extra stone courses down on my Minicraft modeler's table saw went very well, and my DeWalt vacuum cleaner contained the dust. (The cordless option is very handy, if you already have any DeWalt battery-operated power tools. It's also really great for cleaning your car :-) It's not a good idea to use a conventional household vacuum cleaner for plaster dust (although in this small amount it probably wouldn't hurt. Make sure you put a new filter on before starting, and change the filter immediately afterwards.)
Next I prepared the capstones. Per Russ' instructions, here's how I did it. First I used a razor saw to continue the line between stones from the front of the casting to the top of the casting. Then holding an X-Acto knife -almost- vertically, I lightly drew the knife across the casting. You want it to chatter, that's what produces the roughness. I did this in a crosshatch pattern at a 45 degree angle to the run of the stone. Then I went back and did some semicircular 'chops', roughed up the back edge and line between the stones, blew off the dust, and inspected it. To install the stones, it was easy to snap off individual stones, and my coarse file dressed the edges to get the appropriate angle for the bend of the wall.
 A stretch of the wall showing the squared off edge against the
bridge and the capstones.
A stretch of the wall showing the squared off edge against the
bridge and the capstones.
I still need to do the capstone treatment on the parts of the wall where I did not install capstones tonight. Tomorrow, I'll spray the castings to prepare them for finishing.
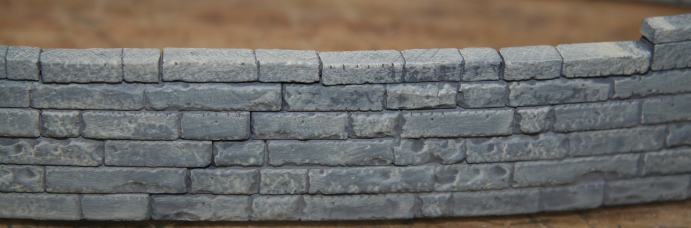
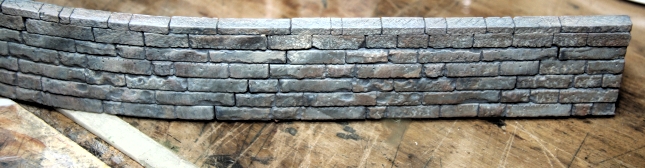
 Splotchy grey rock still looks better than white rock!
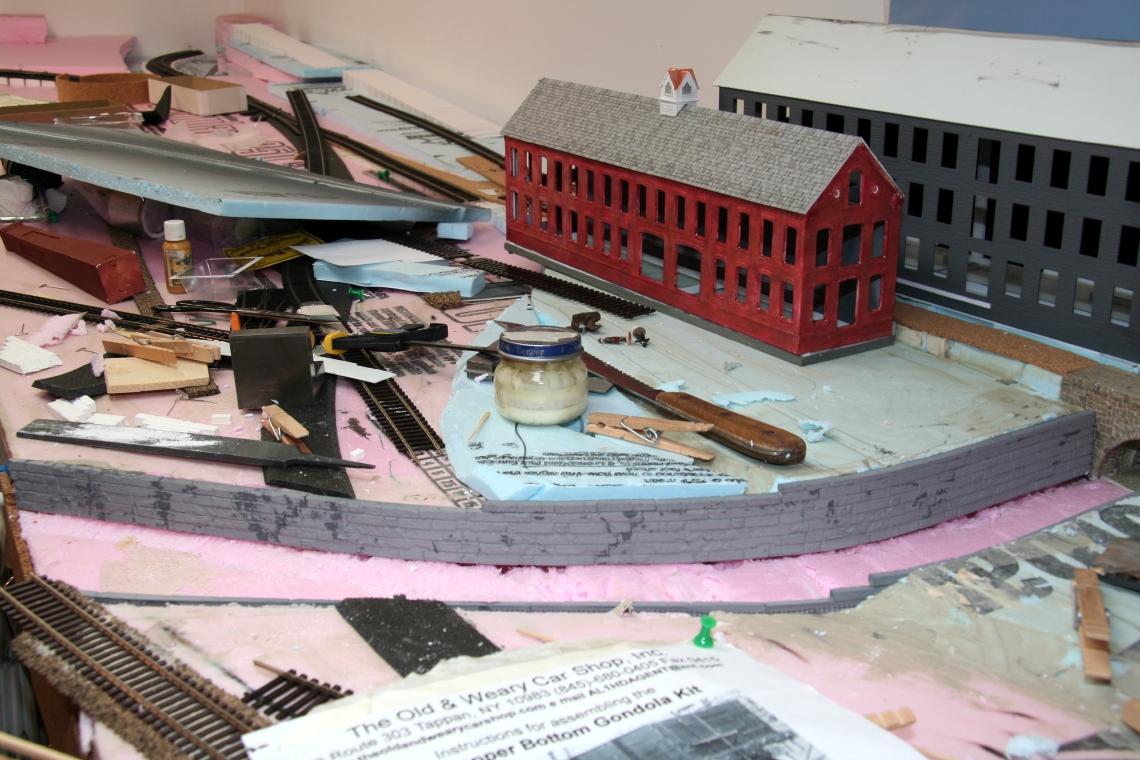
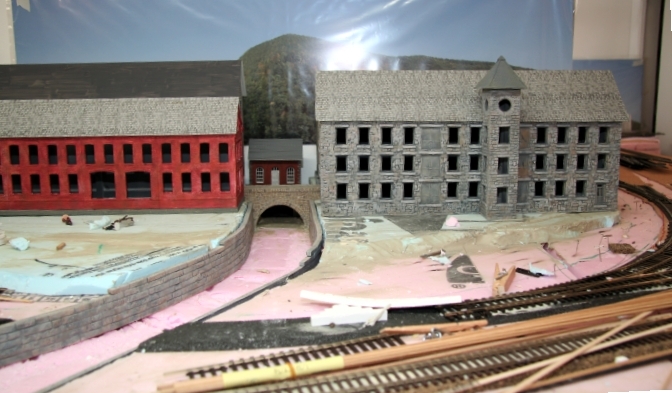
I moved the two front mill buildings back into place and took this tall shot, which gives you an idea of how the scene is shaping up. I didn't put the pony truss bridge in the photo, both because it would make it hard to see things, and because the bridge took some damage during the wall installation. That's OK as there are parts of that model I wanted to redo anyway...
I think I'll take a break and re-spray tomorrow when it's warmer, to get better coverage than I got this morning. Better several light coats, than one thick globby coat. Also, before I do the final spray, I need to go back and 'roughen up' the rest of the capstones (those that are in the larger castings, I roughened up the capstones I glued on yesterday before I glued them.
I'm using the 'drybrush sponge technique.' Basically this consists of using make-up sponges to apply various thin layers of color. The paint is all craft paint from Wal-Mart, Michael's, etc, in the following colors: Rock Grey (light beigy grey), Light Grey (no beigy tint), Pewter Grey (medium-dark grey), Brown Oxide (close to Floquil Roof Brown), Toffee (orangy brown) and Heartland Blue (a greyish medium blue). I'm using yoghurt lids for palettes, and I glob some paint into each.
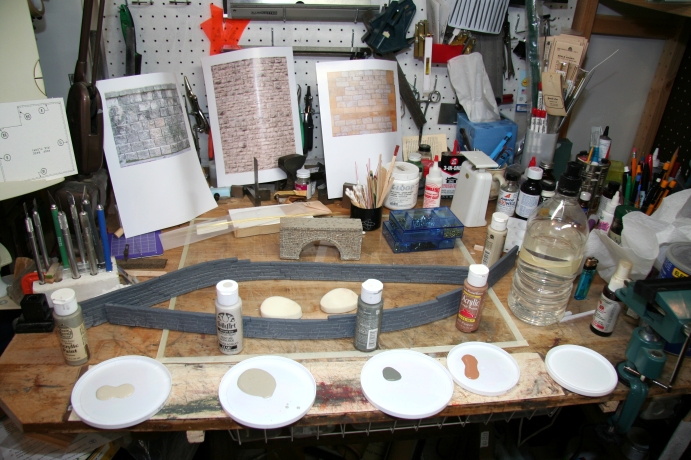
I really helps when you do this to keep some pictures handy of rock you're trying to simulate. Russ has some great photos on his website, reference photos and The Dam Page. Additionally, I've found Mayang's Texture Library to be a great help. You can see some reference photos in the background as I prepared to paint. I grabbed various reference photos, loaded several per page, and printed them out on my printer using the photo setting and photo paper.
The last step is conventional drybrushing with the lightest grey color. I used a 1/2" bristle brush for this. Here's a close-up of the casting when the coloring is done.
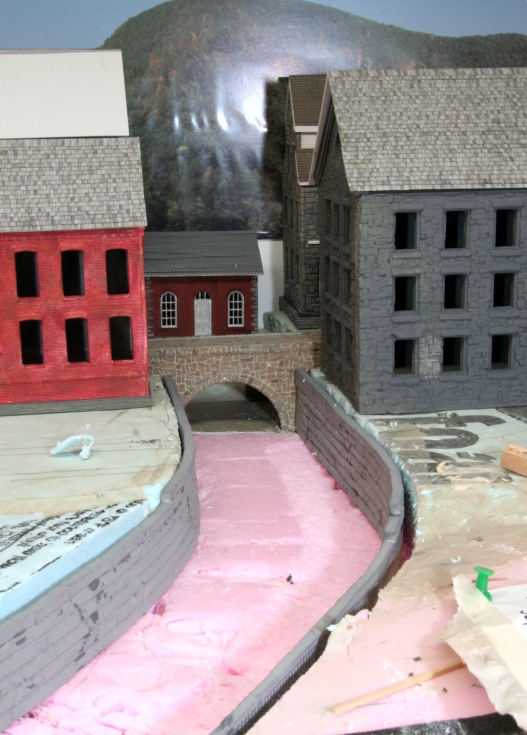
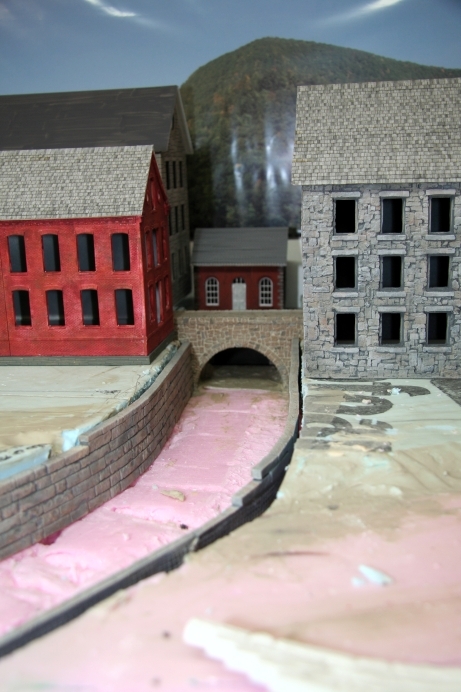
Since I was in a 'coloring mood', I also did the two stone mill buildings that I had not previously finished (back-left and front-right). Here's what it looks like with the canal walls back in place.
And one more photo, a tall skinny shot.
As I mentioned earlier, I should have assembled the walls on the worktable and let them dry completely. Some of the cracks/gaps where the castings slipped are noticeable, but then real walls crack and move too (thankfully...)
There won't be much change here until I start doing scenery, and before I do that, I need to go back and finish laying and wiring the track.
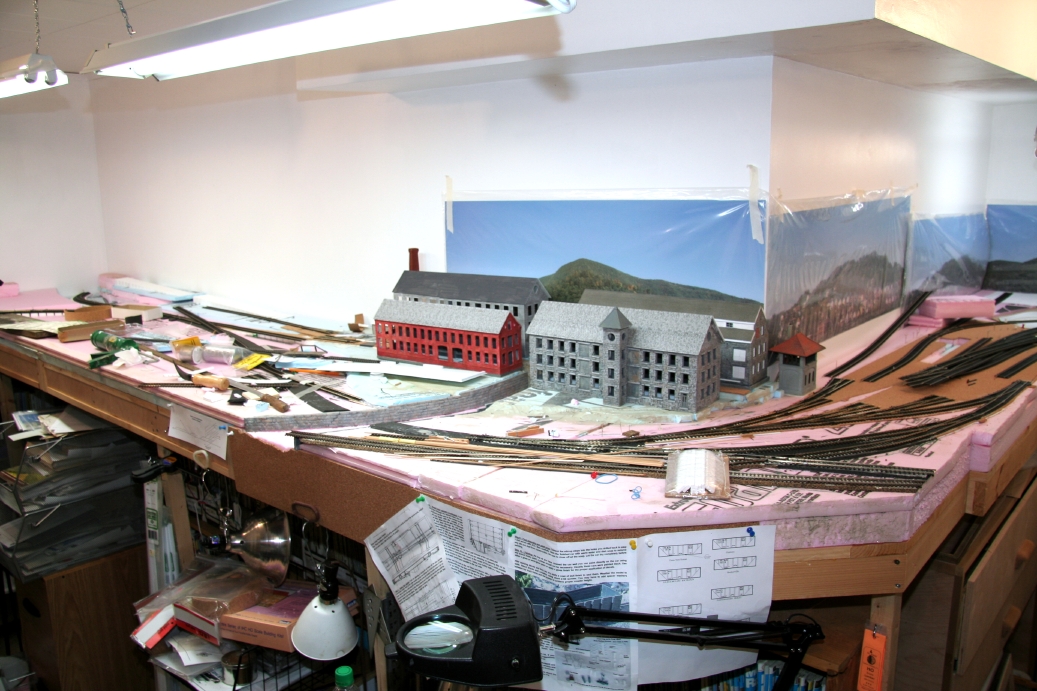
The dark (Woodland Scenics) roadbed is the main line, and obviously I'll need a rail bridge over the canal. (This is where my Post Pony Truss bridge I've talked about on EarlyRail will go.) By happy coincidence, this will hide the most obvious mis-alignment in the castings. There's a foot/wagon bridge that will go in front of the two buildings, you can see (remnants of) the bridge model to the left of the brick mill building. This goes about where the white piece (the 'subfloor' for one of the mill buildings) is, again over the canal. The rail feed to the mills enters from a turnout that is about at the top left of the picture, and goes between the mill buildings (over that stone arch bridge). You can see the smokestack poking over the top of one of the mills. There's a boilerhouse with it, and the coal feed is a 1-car-long siding that switches back from the siding for the mills. I've posted some notes on the mill buildings themselves.
The piece of flextrack on the right that is leaning against some blocks of styrofoam represents my FSM Old Scale Coal Dock. The rest of the cork is the yard, and just out of sight to the right is where the turntable and roundhoues will go. There's another RDA kit serving as the yard office. This is a model of the New Haven's "Buzzard's Bay Tower", and it's a little modern for my layout, but since it was a gift from my wife, it'll represent the first attempts towards modernization and transition from the 1890s to the 1900s. The trackwork at the very front of the picture represents a junction with another railroad, and I have a C.C. Crow G.N. Bellingham station kit which I plan to use as a brand-new Union Depot for the SL&N and 'that other railroad'. This may require extending that corner out a bit, and I'll need to make sure that whatever I do there is "bump-proof", since that corner is a relatively high traffic area.
One of the good ideas I've had recently is to cover the front of the layout (fascia) with cork panels, so I can post kit instructions (what you see hanging loose there are the instructions from the Old&Weary Car Shop's O&W Wood Gondola kit.) You can barely see the under-layout storage, I've built bookcases to hold model RR magazines and to the right, a storage unit for stripwood, etc. (I justify this to my wife, telling her 'the mistakes I make doing this kind of stuff for my train room are learning experiences for all that stuff you want me to build for the rest of the house.')
You can also see the gap/dip in the fascia where the canal meets the edge of the layout. I'll bridge this with plastic and seal it before pouring the water material. I'm planning to use Magic Water. One problem with this product is that it's thin, about the viscoscity of water itself, so I have to be very careful to seal everything in the canal to prevent a nasty leak when I do pour.
Except as noted, text and images Copyright (c) 2007 by David Emery. All rights reserved.
Photos taken with a Canon Digital Rebel XT, EF-S 17-85 Image Stabilized lens and Canon 402EX flash. The layout lighting is a combination of the newer (bluish) color balanced incandescent and color balanced flourescents. Minimal post processing done with Graphic Converter on a Mac. No Windows products were used in the production (or hosting) of this website.