IMG_6220.JPG

IMG_6221.JPG

IMG_6222.JPG

New! IMG_6224.JPG
 IMG_6220.JPG |
 IMG_6221.JPG |
 IMG_6222.JPG |
 New! IMG_6224.JPG |
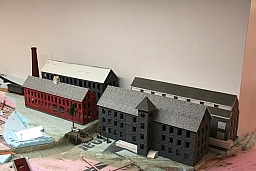
Building kits are (1st photo):
The steep rooflines is the problem with these kits. Typical mill building rooflines were very shallow, maybe 15 to 20 degrees. (Check out some of the South River kits, for example.)
The powerhouse is the stone boiler annex from RDA Easton Mill (I think...) and a Mr. Plaster or Ciebelo Crossing chimney.
The backs of the buildings is either foamcore or the new Evergreen black styrene plastic. There's -extensive- interior bracing in these to hold everything together. Additionally, I make a styrene 'subfloor' foundation for each. That allows me to position the subfloor, glue it down to hold the building into place, while allowing me to move the building models themselves out of the way.
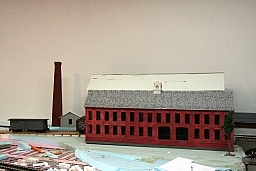
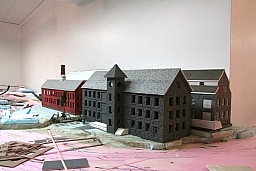
The finish approach is the same on the 3 stone buildings. They're spraypainted auto primer dark grey. The top right building was then 'sponge painted' with varying shades of acrylics (using a make-up sponge, my wife is used to my weird requests...) The brick building was sprayed with an appropriate flat red, and then weathered with ink washes. The wood on the top left building was painted white and then weathered with ink washes. MUCH finishing remains on all of the buildings, along with downspouts (to hide the spice points and keep the HO scale workers a little drier.)
The 2nd and 3rd photos are approximately at eye height on the layout, my benchwork sits pretty high. The 1st photo was shot to get a better view of all 4 buildings. You may notice the white loading dock on the top right building. I'm experimenting with Harold Minkwitz' grey ink over white weathering technique. This needs some more applications of ink/water washes.
If you look carefully on the first photo, at the bottom left of the photo, you'll see a white paper 'marker'. This is the outline for the Mill Manager's building, constructed from a 'Classic Miniatures' "Leadville House" kit, with the walls converted to brick. (There's a photo of the stock wood model on Valley Model Trains website.)
New!
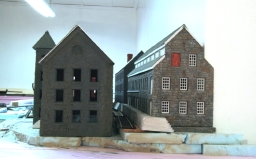
Bob McGlone asked for a 'canyon shot'. The 4th photo shows that there's a single track between the two rows of buildings. It also shows how the right building overlaps the outside corner of the layout room wall, and the loading dock for that building. The normal viewing angle from the front of the buildings (the first 3 photos), so this 'foreshortening' is not really visible. (p.s. The buildings actually do stand perpendicular, I canted the camera to take this picture. It's a tight squeeze there... I've found it's important to use a level to make sure buildings are perpendicular/plumb/level; your eye will really pick up on it if they're not...)
Photos and text Copyright © 2006 by David Emery.